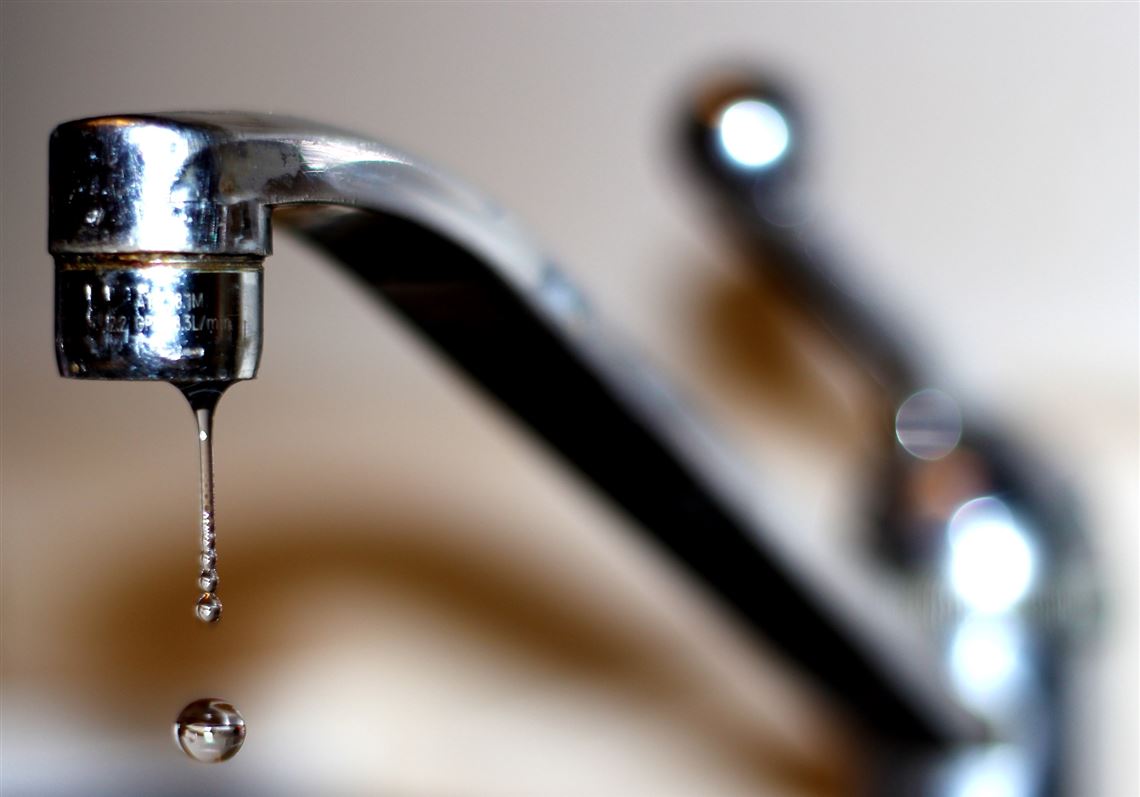
For a family in Long Island City, the completion of a month-long kitchen and bathroom renovation was supposed to be a moment of celebration. They had replaced decades-old cabinetry with sleek, modern finishes and swapped out pitted chrome faucets for high-efficiency brass fixtures. However, within forty-eight hours of the contractors packing their tools, the dream renovation took a confusing turn. When they filled their new deep-soak tub, the water wasn’t the crystal-clear “champagne of tap water” New York is known for. Instead, it was noticeably milky and carried a faint, sweet chemical scent that lingered in the hallway.
This scenario is becoming increasingly common in Queens as more residents invest in upgrading their historic housing stock. While the city’s water mains are treated to high standards, the “last mile” of plumbing inside a renovated apartment or house can undergo significant physical and chemical stress during construction. If you have recently finished a project and noticed that your water looks or smells “off,” you are likely dealing with the unintended side effects of disturbed infrastructure.
The Mystery of the Milky Water: Air vs. Sediment
The most immediate concern for the family was the cloudiness. In the plumbing world, cloudy water is typically caused by one of two things: entrained air or suspended solids. After a renovation, air is almost always the primary culprit. When pipes are cut, replaced, or left open to the atmosphere, air pockets become trapped in the lines. When the water pressure is restored, this air is forced through the faucets at high velocity, creating millions of microscopic bubbles.
A simple way to diagnose this at home—which we often suggest in our faq—is the “glass test.” Fill a clear glass with the cloudy water and set it on the counter. If the water clears from the bottom to the top over the course of a minute, it is simply air. If the cloudiness remains or if particles settle at the bottom, you are likely looking at contaminant types such as silt, rust, or mineral scale that were shaken loose from the building’s older risers during the vibration of construction.
Decoding the Post-Renovation Odor
While the cloudiness was a visual shock, the odor was more concerning to the family. They described it as a “new car smell” mixed with a hint of pool chemicals. In a Queens renovation, odors usually stem from the materials used during the installation process. New copper pipes are joined using flux and solder; PVC pipes are joined using solvent cements and primers. If these materials are not allowed to cure properly or if the lines are not aggressively flushed, they can leach Volatile Organic Compounds (VOCs) into the water.
These VOCs are often responsible for that “sweet” or “plastic” scent. Additionally, if your renovation involved installing a new water heater, you might notice a “rotten egg” smell. This occurs when sulfate-reducing bacteria react with the magnesium sacrificial anode rod in a brand-new tank. As we detail in our section on health impacts, while these odors are often aesthetic, persistent chemical smells can indicate that the water is aggressively leaching materials that shouldn’t be ingested.
The “Vibration Effect” on Old Queens Plumbing
Queens is home to a vast range of housing, from 1920s brick rowhouses to mid-century apartment blocks. In many of these buildings, the internal pipes have a thin layer of “scale”—a mix of minerals and oxidized iron—that has built up over decades. This scale is generally stable, but the physical trauma of a renovation can change that.
The drilling, hammering, and pipe-cutting involved in a remodel send vibrations through the entire plumbing stack. This can cause the internal scale to flake off in high concentrations. For the family in Long Island City, their “new” plumbing was actually being fed by “disturbed” old plumbing. This led to a temporary spike in contaminant types like iron and manganese, which contributed to both the discoloration and the metallic aftertaste they noticed during their first week back in the home.
Why Standard Flushing Isn’t Always the Full Solution
The contractors told the family to “run the taps for five minutes.” While this is a good starting point, it is rarely enough to fully clear a system after a major renovation. In a complex plumbing network, water can become trapped in “dead legs”—sections of pipe that were capped off but still contain stagnant water. These areas can harbor bacteria and concentrated chemicals that slowly “bleed” into the main flow over time.
In our guide to solutions, we recommend a more systematic flushing protocol for post-renovation homes. This involves removing the aerators from every faucet in the house and running both the hot and cold water at full velocity for at least thirty minutes. This high-flow “scouring” is often necessary to dislodge the heavy sediment and chemical residues that five minutes of gentle flow will leave behind.
The Potential Health Impacts of Construction Debris
While most post-renovation water issues are temporary and aesthetic, they shouldn’t be dismissed entirely. The health impacts of drinking water that contains high levels of construction flux, solvent cements, or dislodged lead particles (from old solder) can be significant, especially for children or pets.
Lead is a particular concern in Queens. If your renovation disturbed old lead service lines or pipes joined with lead solder, the “cloudiness” you see might include microscopic lead “fines.” These are tiny particles of lead that have been physically shaken loose. Unlike dissolved lead, these particles can provide a very high dose of the metal in a single glass of water. If your water remains cloudy or metallic-tasting after a week of flushing, it is no longer a “renovation quirk”—it is a safety risk.
Establishing a Safety Baseline Post-Renovation
The family eventually decided to stop guessing and perform a formal water audit. They were surprised to find that while the VOC levels from the plumbing glue were dissipating, their lead levels had spiked due to the disturbance of the building’s main riser. This data allowed them to move from anxiety to action.
As we often suggest in our blog, anyone who invests thousands of dollars in a kitchen or bathroom remodel should include a $200 water test in their budget. It is the only way to ensure that your new fixtures are delivering water that is as high-quality as the finishes they are mounted on.
Conclusion: Turning the Tap on a Healthy Home
The story of the Queens family ends with a proactive shift. By installing a high-quality under-sink filter as one of their final solutions, they were able to bridge the gap between their new fixtures and the building’s old pipes. They learned that a renovation isn’t just about what you see on the surface; it’s about the invisible systems that sustain your daily life.
The most effective next step for any Queens resident who has recently completed a renovation—or is currently in the middle of one—is to establish a post-work safety baseline. If you are experiencing persistent cloudiness, strange odors, or a change in water taste, do not assume it will just “go away.” The best path forward is to contact a professional today to schedule a comprehensive analysis. Whether you need to understand the health impacts of your specific pipes or you are looking for long-term solutions to urban water issues, we are here to help you enjoy your new home with total peace of mind.